Choosing Wisely Badge Card

Overview

SUMMARY 

Similar to pocket cards or badge cards used in the clinic for taking a patient history and physical exam and giving oral patient presentations, medical students are provided badge cards containing high-value care guidelines and principles. 

PURPOSE 

To familiarize medical students with relevant high-value care guidelines in an accessible and digestible way, and to provide medical trainees with a badge card containing suggestions for discussing high-value care concepts pertaining to tests, treatments, and procedures. The relevance, scalability, and accessibility offered by badge cards inspires students and trainees to pursue the initiative, with the ultimate goal being to begin and to guide more conversations about high-value care as they begin their clinical careers.

WHY IMPLEMENT 

  • Badge cards are an excellent way to provide quickly accessible information to students and trainees and to communicate high-value care guidelines and principles.
  • Badge cards can be easily added to existing badge holders (see graphics below – courtesy of Johns Hopkins University and University of Chicago) and are relevant to all students at any level of training or in any specialty.
  • Badge cards are an excellent way to narrow down the vast number of Choosing Wisely recommendations to just a few of the most clinically relevant guidelines for medical students.
Example (JHU) badge card 
Front of badge cards
Back of badge cards
Example (University of Chicago) badge card 
STEPS FOR IMPLEMENTATION
  1. Design Badge Card – feel free to adapt existing Choosing Wisely badge card templates above:
    1. read through guidelines on the Choosing Wisely website, compiling a list of recommendations you think would be most clinically relevant to your medical student peers;
    2. if possible, consult with MS3/MS4s and faculty mentors, who may be able to provide valuable input on which guidelines are most relevant to students;
    3. narrow the list of guidelines to those which will be able to comfortably fit on the badge card.
  2. Create Sample Proofs of Badge Cards to Test Utility/Readability:
    1. there are a variety of software available, ranging from Microsoft Powerpoint to Adobe Illustrator and more (see “Graphic Design Resources” below);
    2. make sure the print on the card is large enough to be easily read, and feel free to get creative with colors/images/etc. – using colors and borders to categorize concepts may effectively guide readers to key parts of the card.
  3. Identify Badge Card Printing Service (see “Printing Resources” below)
  4. Secure Funding for Printing Badge Cards – explore funding opportunities with faculty mentors Submit Badge Cards for Printing:
    1. there are a variety of printing companies – because badge cards are so ubiquitous, you may be able to get in touch with someone at your local institution(s) with experience printing badge cards;
    2. many printing companies will accept pdf files of your final design – please be sure to keep all vital text/images within the boundaries of the safe zone (or live area).
    3. Distribute Badge Cards:
  5. try to distribute at large gatherings or alongside other items being distributed;
  6. create short, elevator pitch for those distributing badge cards;
  7. engage faculty mentors or other high-value care champions to help you distribute
HELPFUL RESOURCES

Graphic Design Resources:

  • https://www.canva.com/Vector-based graphic design website with free templates and graphic assets
  • https://www.photopea.com/Free online pixel-based image editing software with similar functionality to Adobe Photoshop

Printing Resources:

  • https://www.k12print.com/ Affordable printing with many options for printing materials and dimensions
  • https://www.plasticresource.com/ – be sure to keep all vital text/images within the boundaries of the safe zone (or live area)
BEST PRACTICES
  • Get multiple opinions on the badge card’s design – it can help you identify areas that can be made clearer or more impactful – focus on an eye-catching, “user-friendly” design
  • Use professional printing and thoroughly check proofs before printing – firm, high-quality badges last longer and are more likely to be used
  • Keep in mind who will be using the cards – cards that can be used by all students, regardless of level of training or specialty and those that contain guidelines that are actionable in the clinical learning environment might be more effective
  • Accompany badge card distribution with a short, impactful explanation (“elevator pitch”) of High Value Care/Choosing Wisely principles – this will be especially helpful for recipients who do not already have background knowledge in these areas
LESSONS LEARNED
  • Gaining clinical perspectives from other medical students and faculty is key
  • Printing proofs with regular paper using your intended badge card dimensions so you can preview what the final product will look like will help you avoid making the font too small to read
  • Making sure your design adheres to the dimensions/margins provided by the printing service you are using so that you prevent any important information from being cut off
  • Distributing badge cards should be done at large gatherings or piggy-backed with other things that need to be widely distributed – distributing via piecemeal method can be labor-intensive
  • Taking advantage of institutional funding and resources for card printing is helpful – DON’T be afraid to ask for help!
IMPACT STATEMENTS

“Not only will these cards help promote a culture of discussing high-value care concepts during medical decision making, but they can also be used to teach patients to be their own advocate regarding their care when it comes to tests, treatments, and procedures.” – Christian Hopkins, MS2, Johns Hopkins 

“Choosing Wisely badge cards are a simple yet effective way to educate our peers about ways that they could encourage high-value patient care in the clinical environment and provide them with a durable resource that could be easily referenced on the wards.” – Gary Wang & Sarthak Aggarwal, MS3s, University of Chicago

“I am a big fan of using the built environment to reinforce important concepts, which is one reason why I am a huge fan of the badge cards for Choosing Wisely – it’s something the students wear and have on them at all times as a way to reinforce that this is an important part of everyday clinical practice.” – Dr. Vineet Arora, MD, Dean of Medical Education, University of Chicago – Pritzker School of Medicine

Champions

Christian N. Hopkins is a second-year MD/PhD student at Johns Hopkins University School of Medicine who is interested in dermatology and studying regenerative medicine. In his free time, he enjoys singing, playing ukulele, photography, and woodwork. Email: chopki22@jhmi.edu

Sarthak Aggarwal is a third-year medical student at the University of Chicago Pritzker School of Medicine. At the Pritzker School of Medicine, he served as a leader of the Health Policy Interest Group and the Director of Community Outreach & Global Health for Pritzker’s NLVS Free Clinic chapter, and he is currently pursuing a certificate in Healthcare Delivery Science and Innovation. His research focuses on the use of simulation modeling to investigate disparities in diabetes treatment coverage and outcomes. Sarthak is passionate about addressing inequities in health care, promoting high-value care, and advocating for patient empowerment. Email: Sarthak.Aggarwal@uchospitals.edu

Gary Wang is a third-year medical student at the University of Chicago Pritzker School of Medicine He is passionate about value-based care transformation, crosssector collaboration to improve community health, and access to quality care for marginalized populations. At Pritzker, he has been involved in the Health Policy Interest Group, Chicagoland Free Clinics Consortium, Medical Student Pride Alliance, and Community Health Clinic. His research focuses on evaluating the impact of population health initiatives and alternative payment models on health & cost outcomes for patients with diabetes. Email: gary.wang2@uchospitals.edu

EXEMPLAR - UNIVERSITY OF CHICAGO

Badge cards back and front copy

EXEMPLAR - JOHNS HOPKINS UNIVERSITY

ID Badge 3.375 x 2.125 Template

Workflow Manual

Workflow for designing and printing cards with K12Print

Created by Christian N. Hopkins, JHUSOM MD/PhD Candidate Class of 2029

Email: chopki22@jhmi.edu – Please reach out if you have any questions!

Note: These instructions are intended to use for printing cards of credit card dimensions (3.375″ x 2.125″) with a horizontal lanyard slot placement from k12print.com. Adapt these instructions at your own discretion.

Included attachments:

Note: Excluding the original template pdf, all attachments have dimensions of 3.465″ x 2.275″ and 800 DPI. These dimensions are larger than the final dimensions of the print (3.375″ x 2.125″) to account for bleed and cutting margins.

  • Template Margins.PSD o Photoshop document containing layers for each margin as an overlay as well as folders to paste front and back of your card design
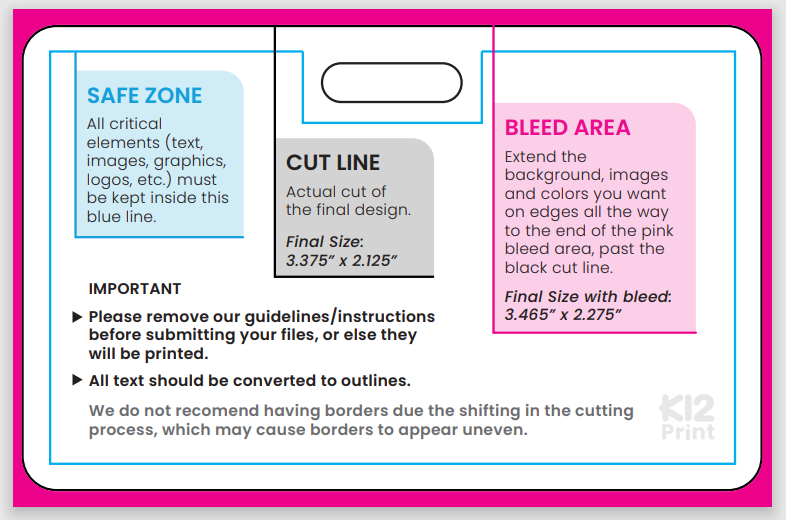
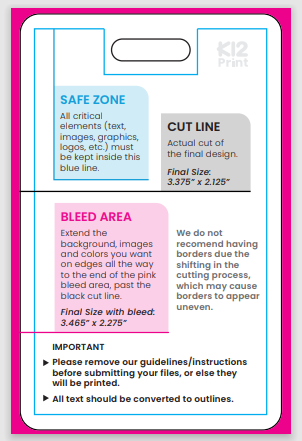
  • Template Margin – Safe Zone.PNG
  • Template Margin – Cut Line.PNG
  • Template Margin – Lanyard Slot.PNG o These are individual PNG images of the margins for the safe zone (where all the critical elements should be kept), the cut line (the actual cut of the final design) and the lanyard slot.
    • Everything outside the cut line is the bleed zone for elements you want on edges that extend all the way to the end
  • ID Badge 3.375 x 2.125 Template.PDF o PDF of the original template, including both horizontal and vertical lanyard layouts
  • ID Badge 3.375 x 2.125 Template (800DPI).PNG o PNG of the original template for horizontal layout only
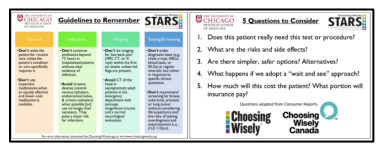
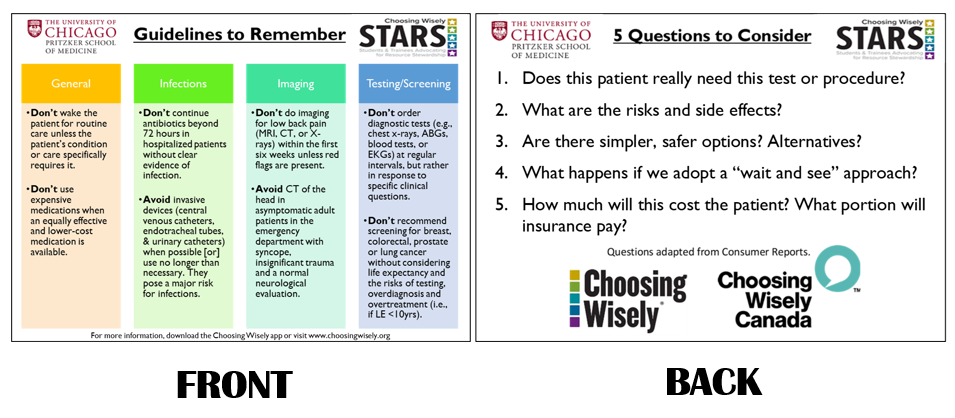
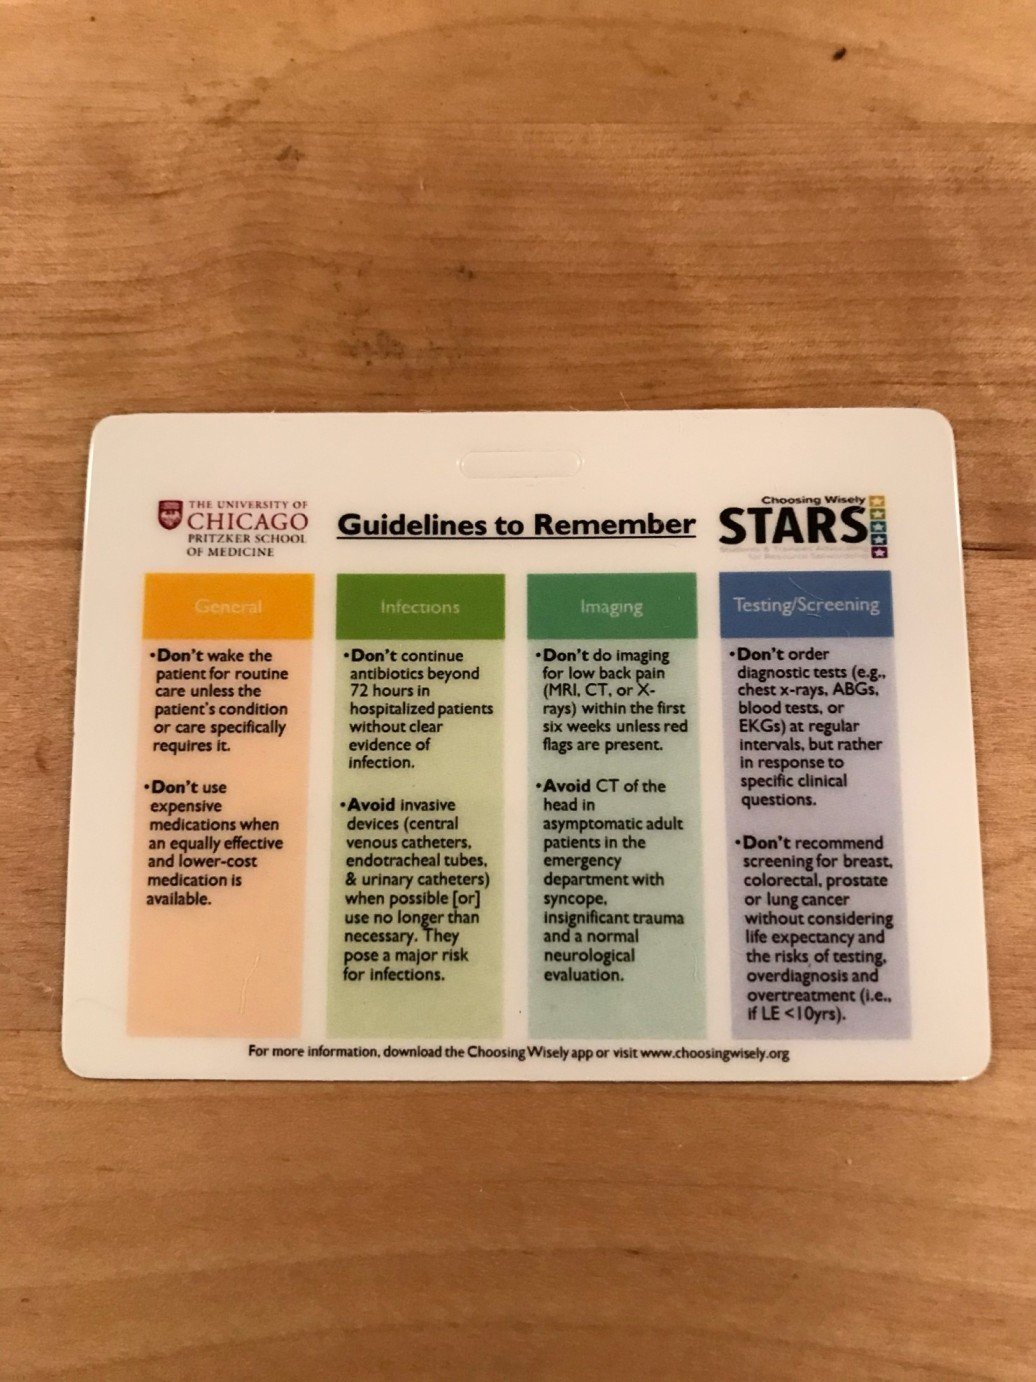
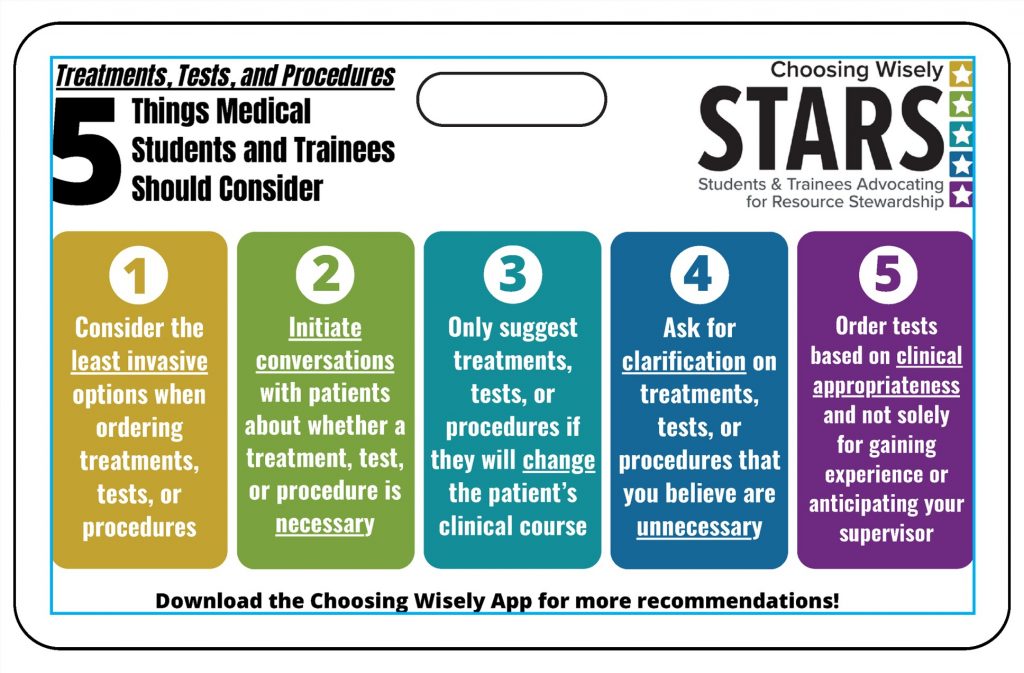
  • Example Template Overlay – FRONT.PNG
  • Example Template Overlay – BACK.PNG o PNGs of an example card design front and back with the margins overlayed
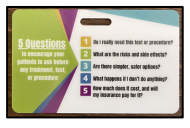
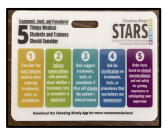
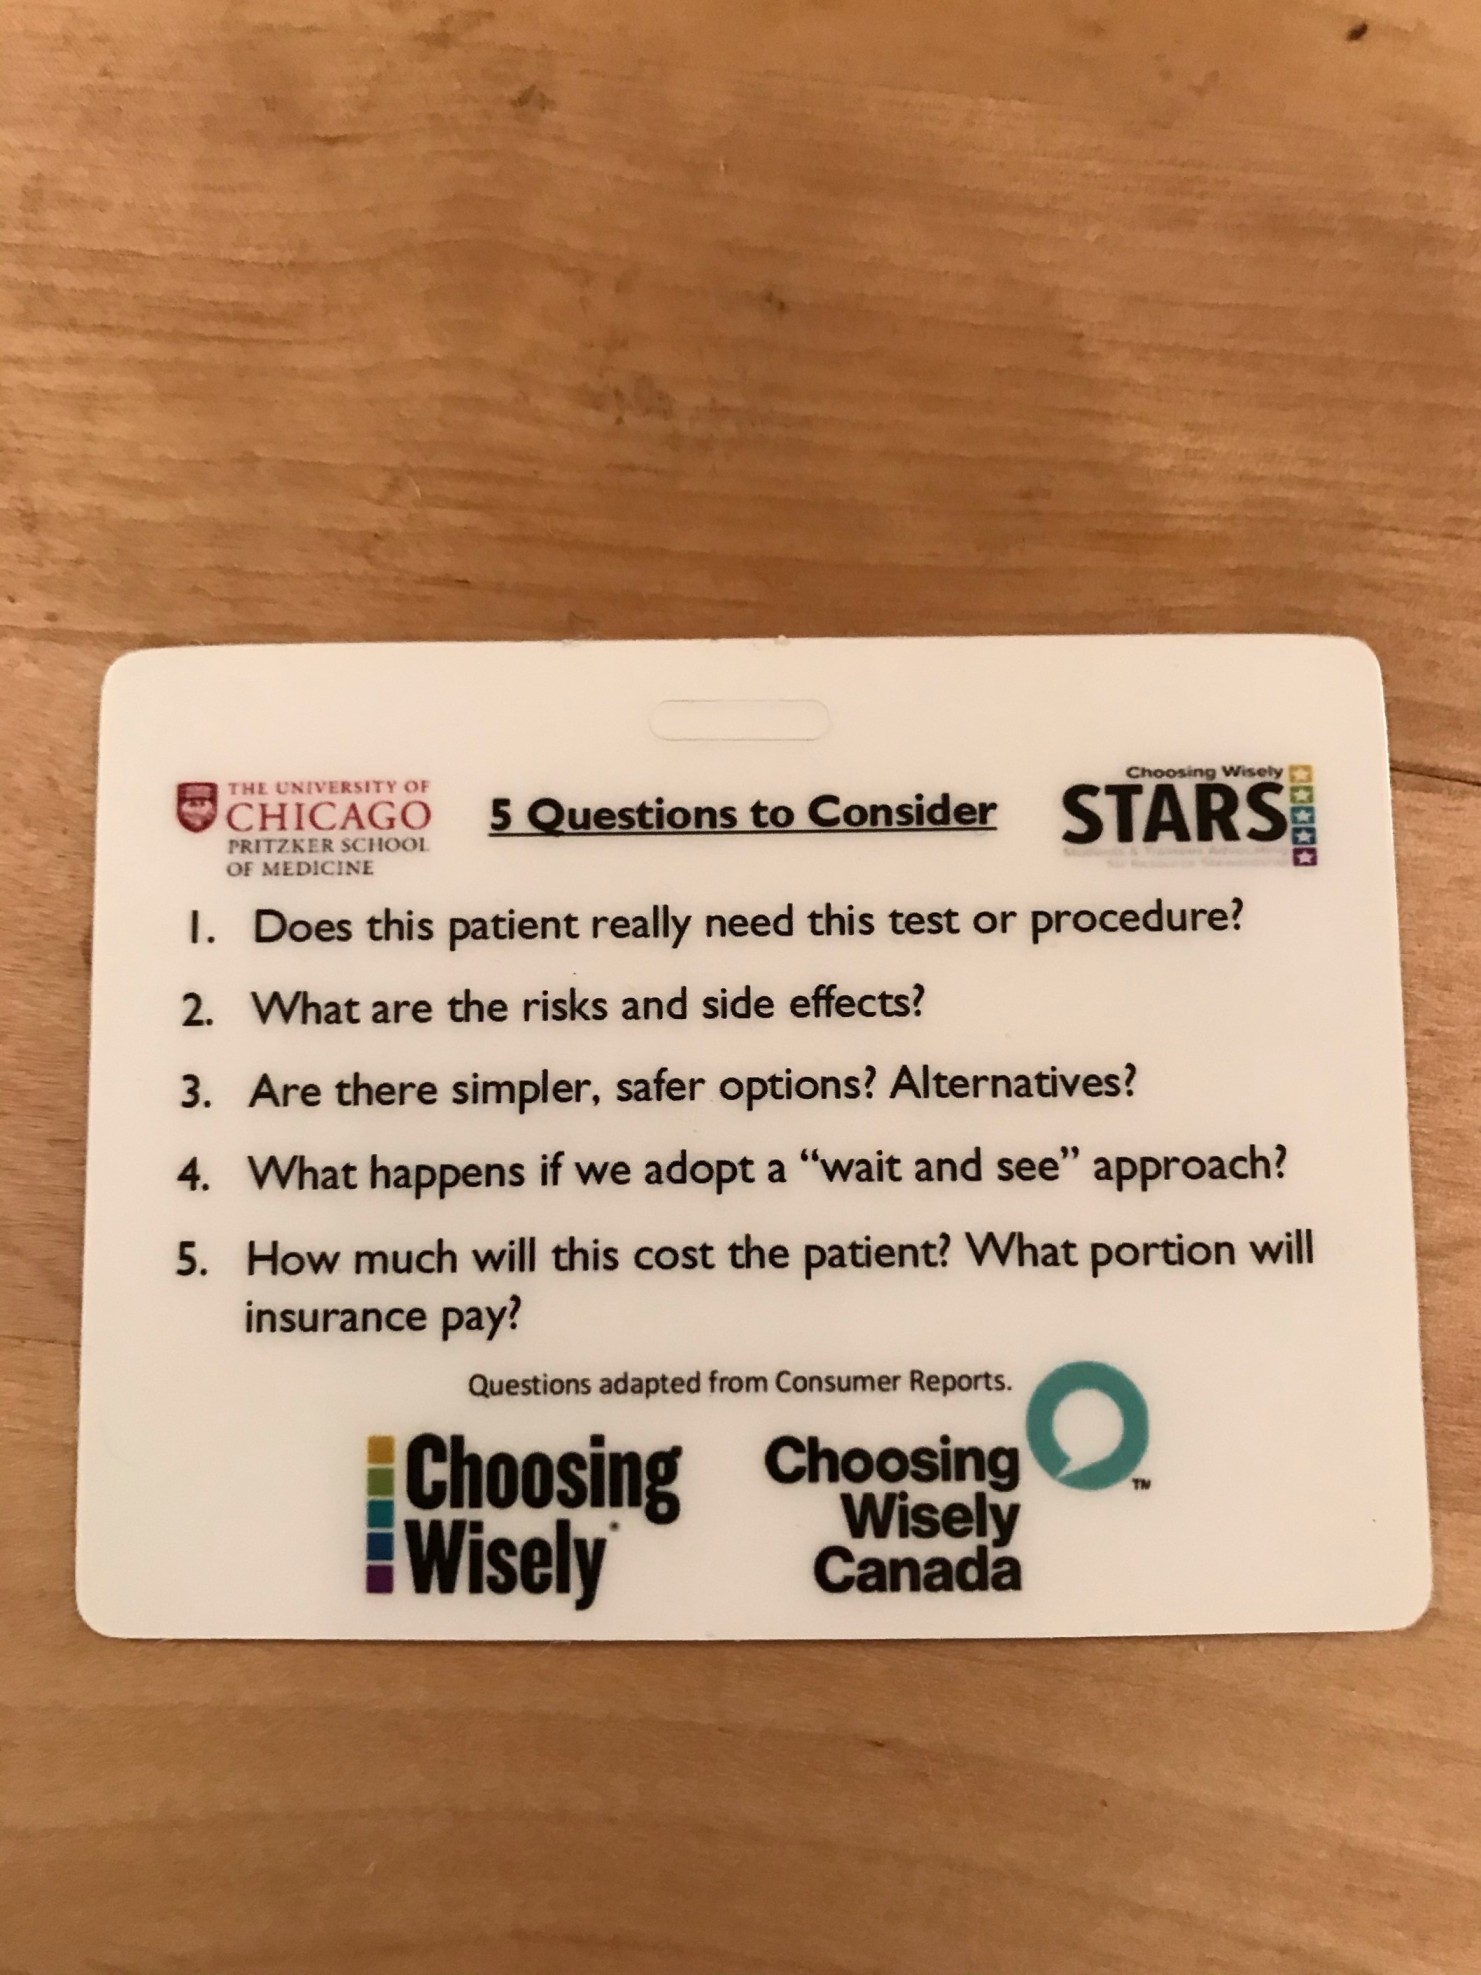
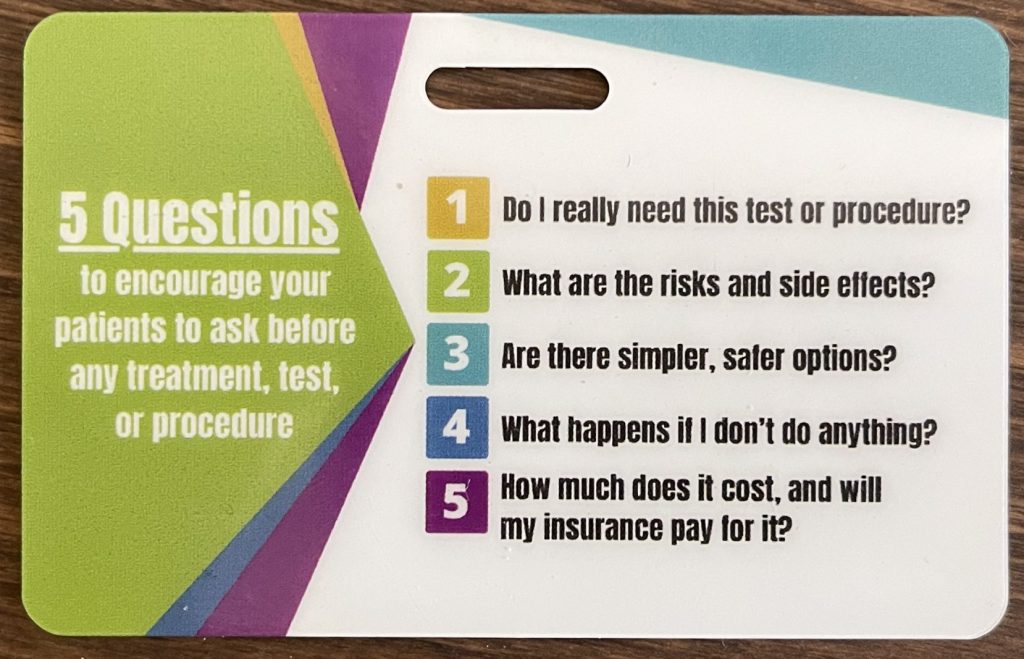
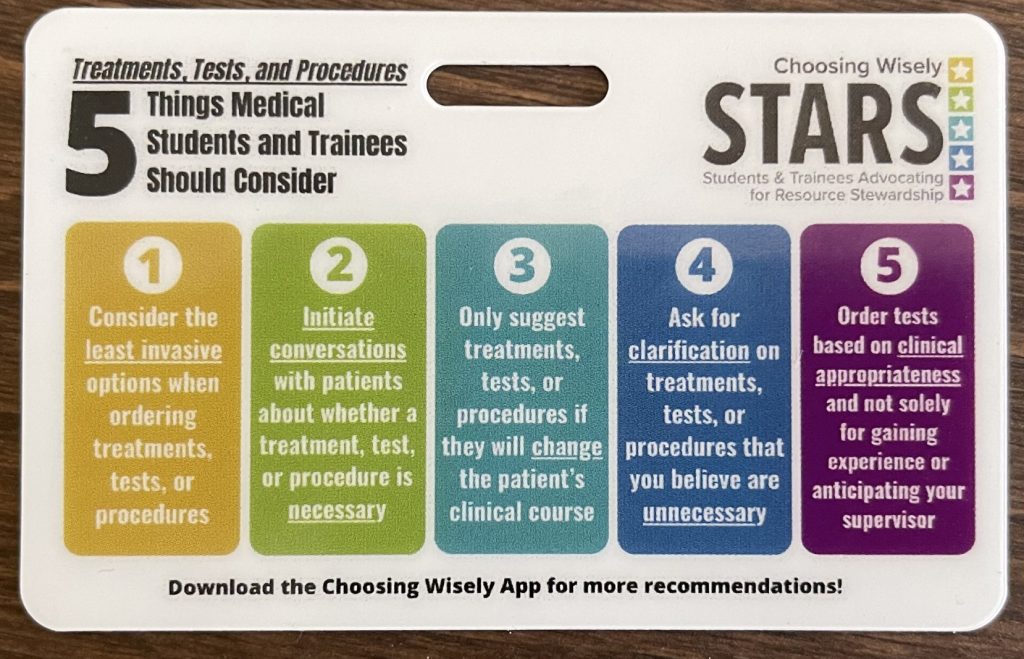
  • Example Print – FRONT.PNG
  • Example Print – BACK.PNG o Images of the printed example card to illustrate final result              

Card Design:

Note: When designing the cards, make sure to have the document dimensions be 3.465″ x 2.275″ (and 800 dpi if working in a non-vector-based program like Photoshop). This is to account for bleed and cutting margins.

  • https://www.canva.com/ is an excellent resource for designing cards, as they use a vectorbased format and provide many graphics and design templates for free o Canva doesn’t let you create documents with custom dimensions in the free version, so you will need to select the free “business card” template (3.5” x 2”). We will be correcting the dimensions later on in this guide

o To export from Canva, click Share -> Download and choose “PDF for Print”

  • You may also use professional design software such as Adobe Illustrator or Photoshop.

o https://www.photopea.com/ is a free, browser-based version of Photoshop that has excellent functionality and can be used if you do not have Photoshop.

  • Cards can also be designed in PowerPoint or Google Slides and exported as a pdf. Remember to change the document to the appropriate dimensions.

Template alignment:

Note: These instructions are designed for use with the free image editing site https://www.photopea.com/. However, any layer-based image editing software may be used.  

  • Go to Photopea and open Template Margins.PSD
  • With the “FRONT” folder selected, click File -> Open & Place and select the design for the front of your card. Repeat using the “BACK” folder for the design for the back of your card.
    • If the file dimensions of your design are 3.465″ x 2.275″, then your image should automatically align correctly with the edges of the document

▪   If it doesn’t align, then the dimensions of your design may be different than 3.465″ x 2.275″, in which case either adjust your original design in whatever software you used to make it or adjust it directly in Photopea.

  • If you used Canva, then the margins won’t line up since Canva doesn’t offer credit card dimensions for their files when using the free version
  • You can transform your image directly in Photopea using Edit -> Free Transform

▪   If it does align but looks blurry, then the resolution of the file for your design may be too low. 3.465″ x 2.275″ at 800 DPI is the equivalent of 2767 x 1818 pixels. Adjust the resolution of the file of your original design

  • Check to see if your design fits within the margins as expected o All the critical graphics should be inside the blue line
    • If you want graphics to extend to the edge of the card, make sure that they extend into the bleed zone past the cut line

▪ See Example Template Overlay – BACK.PNG for an example of bleed

  • If the margins fit, then you are ready to submit!
  • If the margins don’t fit, re-edit your design in the original program used for the design and repeat from step one of this section or edit directly in Photopea o If editing in Photopea, remember to export your designs WITHOUT the overlaying margins

   ▪   Hide the margin layers by clicking the “eye” next to the layer

Submitting to K12Print:

Note: These are just the settings that we chose to print out cards. Feel free to customize your own order as you see fit.

  • Go to https://www.k12print.com/
  • Select All Products -> Plastic Card – Credit Card Size For our order, we used the following settings:
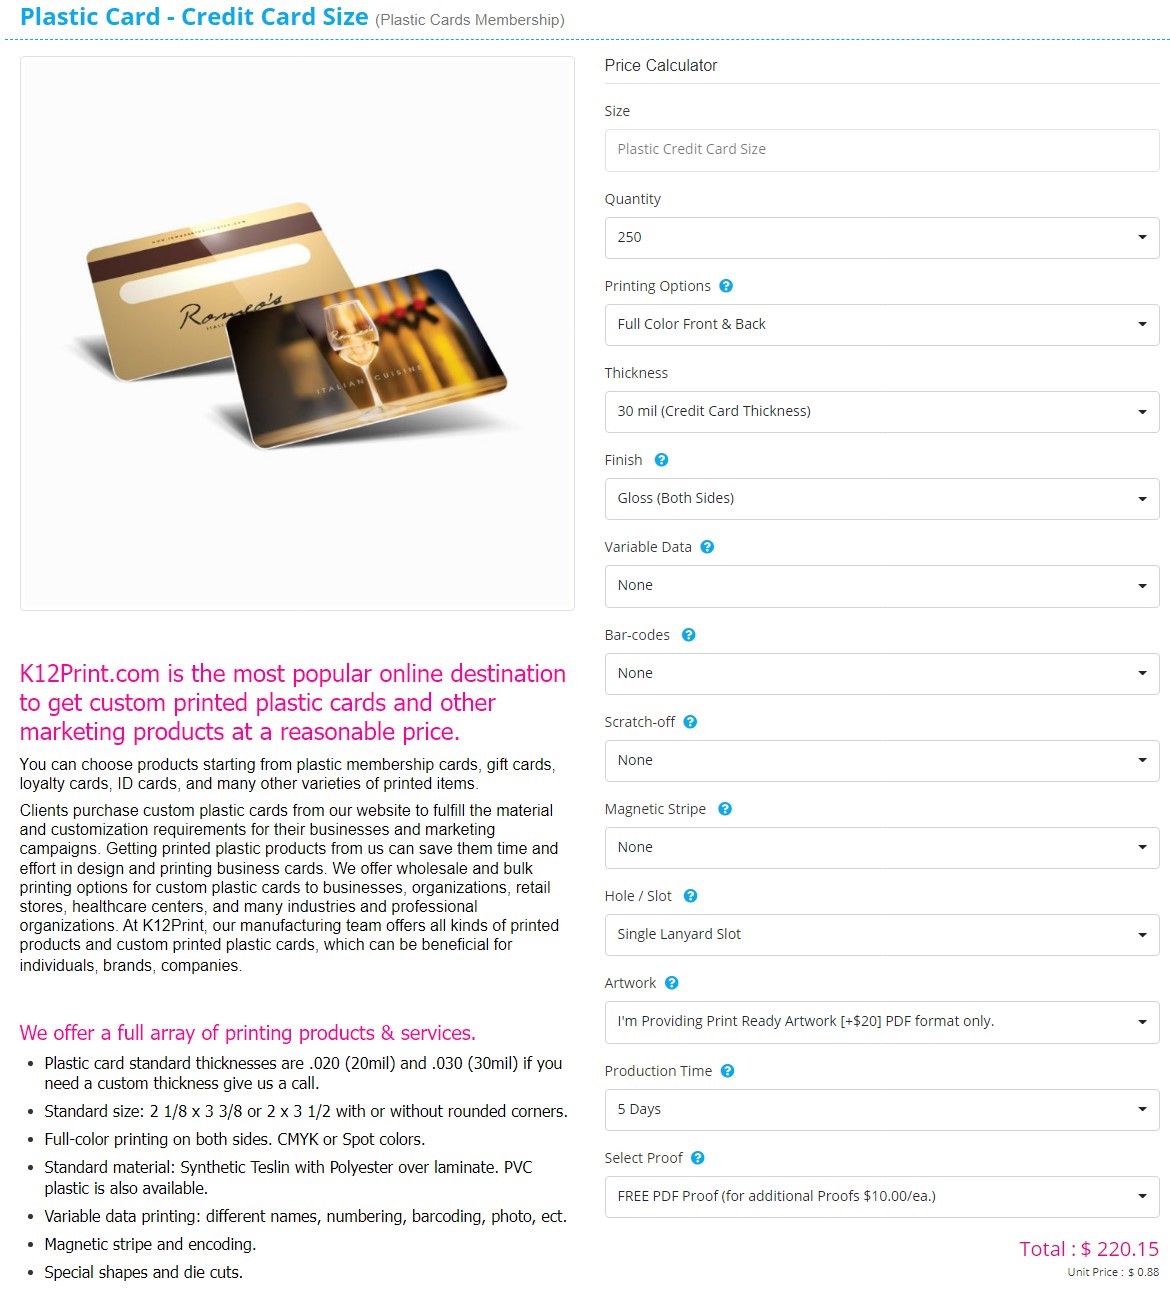
  • Follow the remaining steps to upload your artwork and submit payment and shipping details o There is no option to select whether the lanyard slot goes on the long or the short edge. There is a space for comments during the order process, so you can let them know there.
  • Wait for your beautiful cards to arrive!